

How-to guide
Setting Up Your Telos: Stream Vision 2, Recording and User Mode
Most new owners expect to set up a Telos through the phone app. In fact, Wi-Fi is switched off by default, and almost everything you need on the first night is done with four buttons and the two rings on the lens. The Stream Vision 2 app is for firmware updates, downloading footage and remote viewing, and it's worth setting up at home before you head out.
This guide follows Pulsar's manuals for the standard Telos models. The flagship LRF XT50 adds NFC pairing and a few extras, covered in our Telos LRF XT50 review. For choosing a model, start with our Pulsar Telos buyer's guide.
The kitchen-table setup
The night before your first trip, sit down with the Telos, its charger and your phone. The six steps below take about as long as a cup of tea, plus charging time.
Pulsar's manual gives you three ways to charge the LPS 7i: through the unit with the cable and adapter, through the battery's own USB-C port, or on a Qi wireless charger. Fit the battery with its contacts facing the top of the device until it clicks. Then set the dioptre on the eyepiece first, until the on-screen icons are sharp, and only then use the focus ring on the lens to sharpen the scene. Doing it in that order saves a lot of fiddling in the dark.
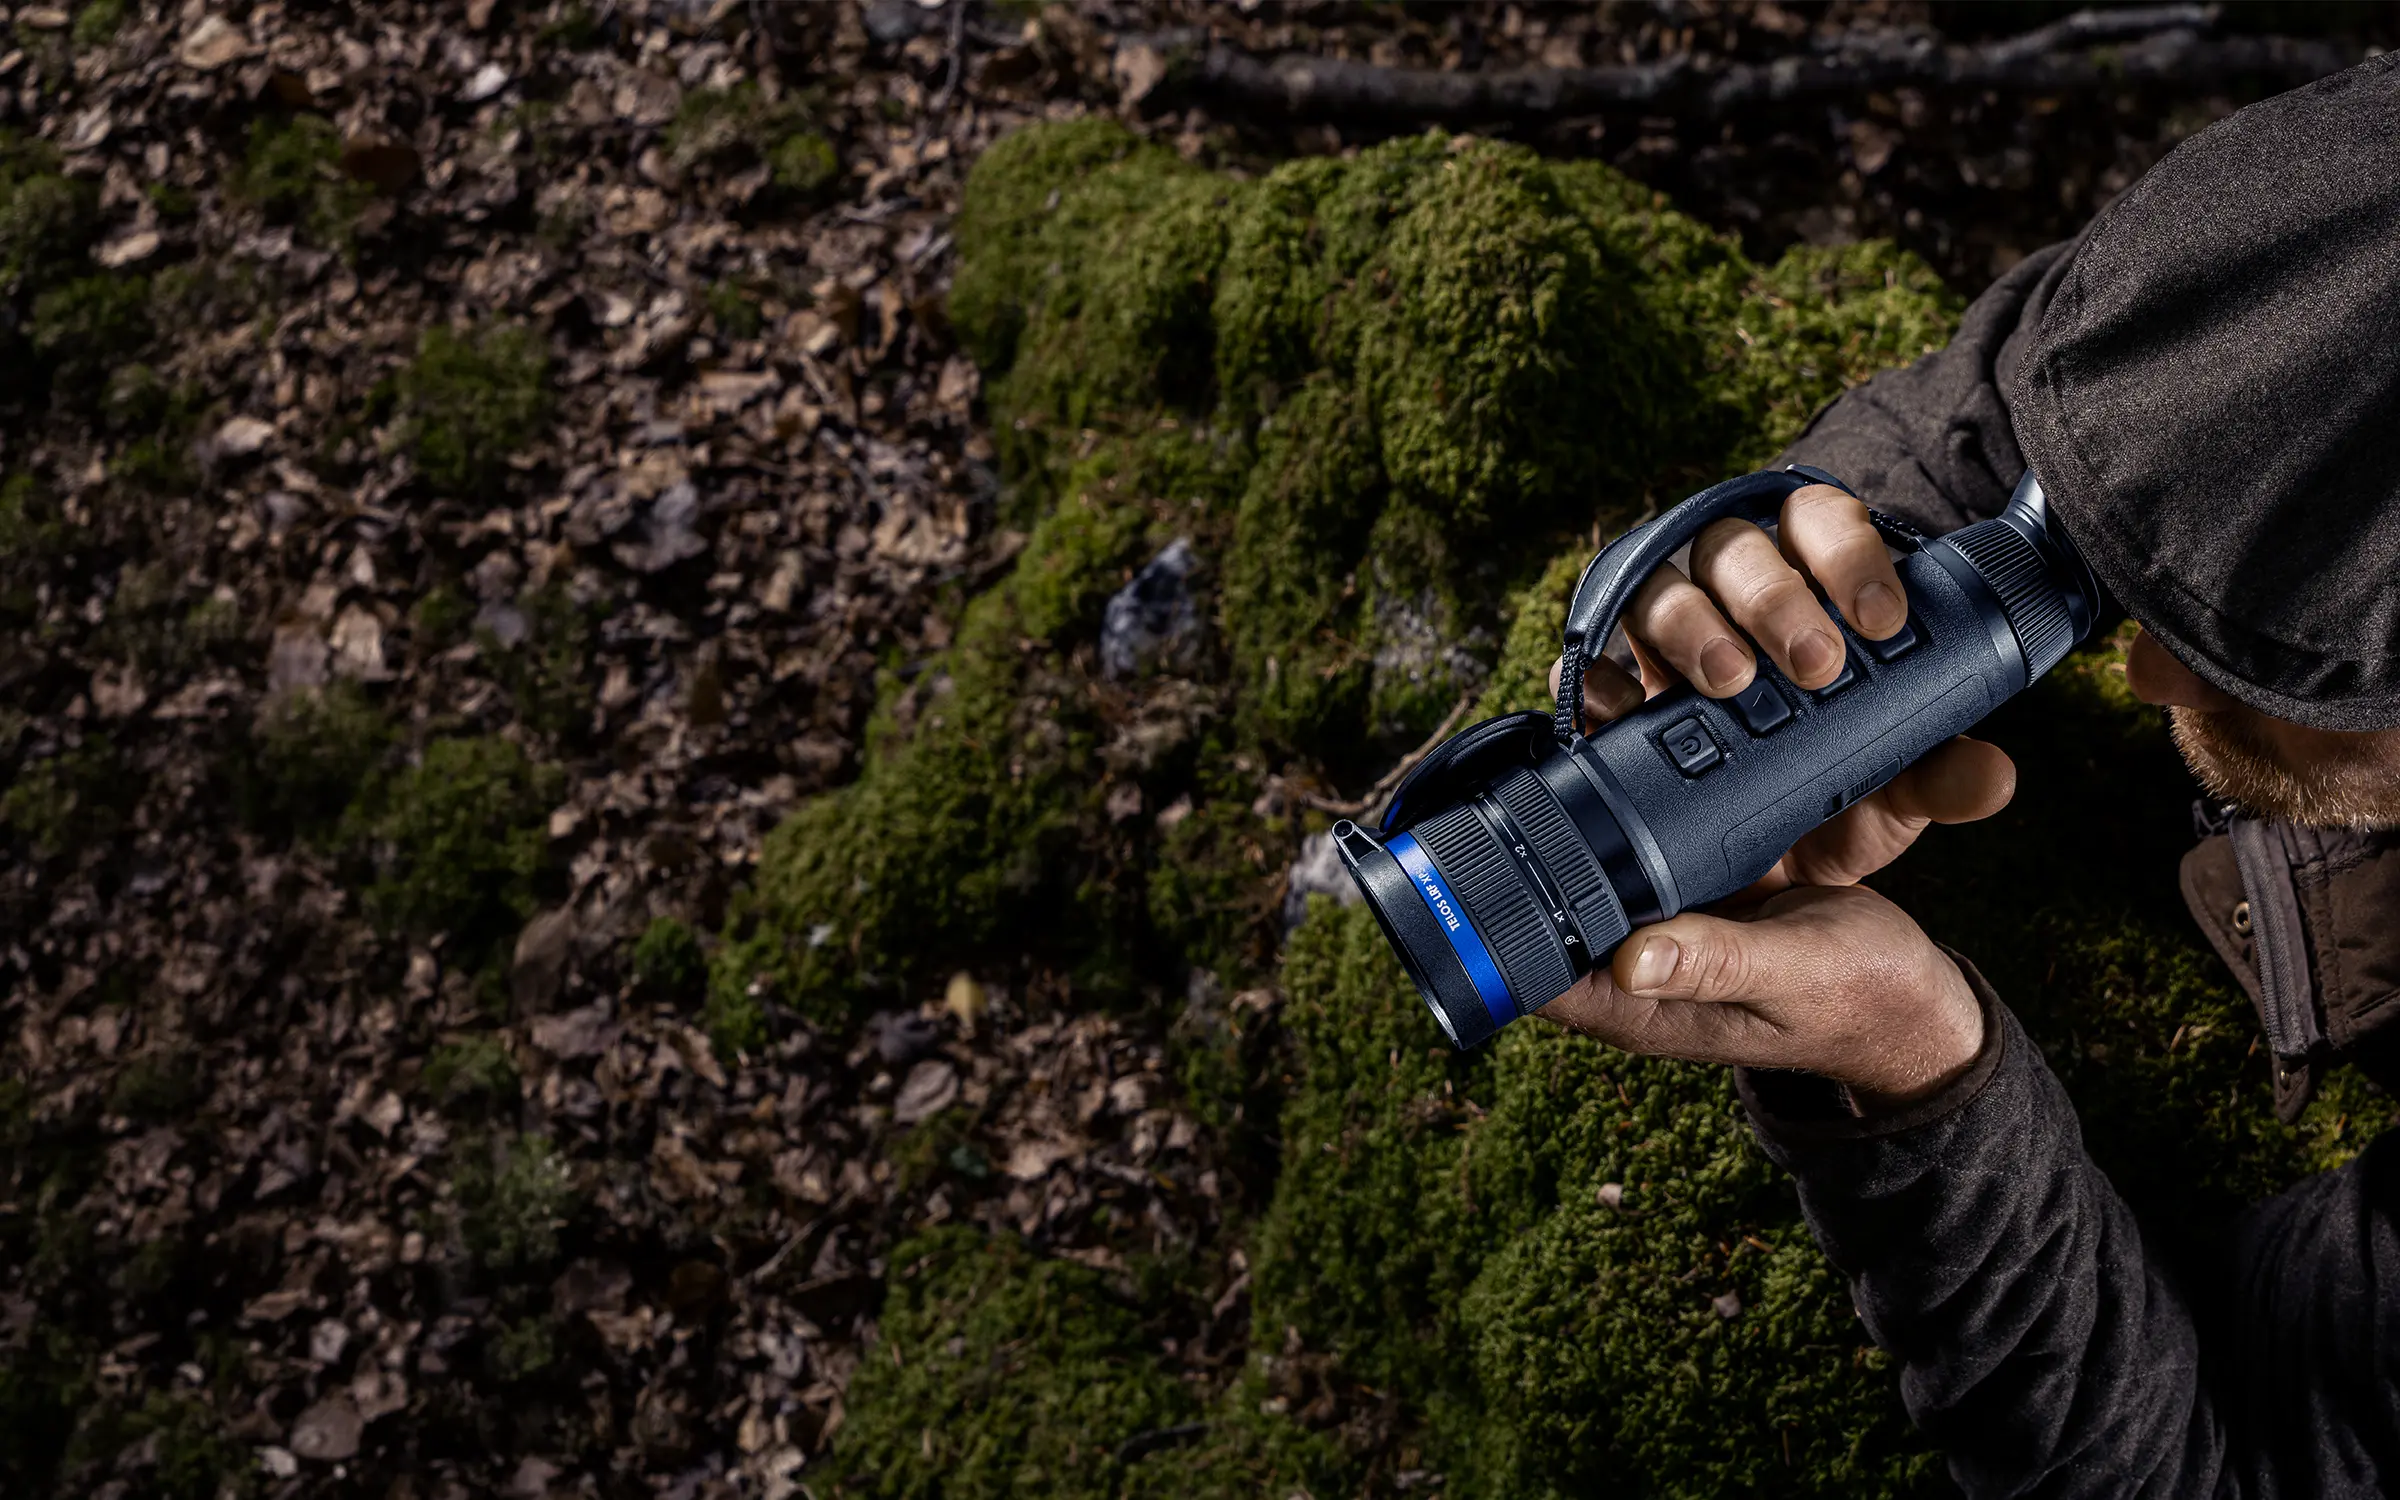
The four buttons
Pulsar's manual sets out what each button does. It's worth learning before dark, because the short and long presses do different jobs.
| Button | Short press | Long press |
|---|---|---|
| ON/OFF | Power on, calibrate, or wake the display | Display off (under 3 s) or power off (3 s) |
| UP/REC | Start, pause or resume video, or take a photo | Stop recording, or switch video and photo modes |
| MENU | Open the quick menu, or confirm | Open or exit the main menu |
| DOWN/MODE | Change amplification level | Toggle the White Hot palette |
A short press of MENU opens the quick menu, with brightness, contrast and the stadiametric rangefinder. That tool estimates distance by fitting a target between two bars, with preset heights for a hare at 0.3 m, a boar at 0.7 m and a deer at 1.7 m. On non-LRF models, it's the only built-in way to estimate range.
Calibration, amplification and palettes
A thermal sensor needs regular calibration to keep the picture clean. The Telos offers three modes, shown below.
Amplification has three levels: Normal, High and Ultra. Pulsar says the higher levels help when temperature contrast drops, such as in fog or rain, and suggests turning on the smoothing filter to reduce the extra digital noise. On a muggy night, try High before you reach for Ultra.
There are nine colour palettes, with White Hot as the default; a long press of DOWN/MODE jumps back to it. For scanning, we'd start with White Hot or Black Hot. Once you've found the brightness and contrast you like, switch on User Mode in the main menu and the Telos will keep them for next time.
Wi-Fi, Stream Vision 2 and updates
To connect the app, open Wi-Fi Settings in the main menu, switch on Wi-Fi Activation and set a password. Your phone will see a network named TELOS followed by the last four digits of the serial number. If your phone only supports 2.4 GHz, switch the Telos to its 2.4 GHz band; it also offers 5 GHz.
Once connected, Stream Vision 2 lets you download photos and videos, view the live image on your phone, control the device remotely and store files in the cloud. For firmware, open Settings in the app, select your device and tap "Check firmware update". The Telos reboots when it's done. Pulsar's own step-by-step video is at the top of this article.

Small settings worth knowing
The microphone is off by default, so turn it on in the main menu if you want sound with your video. Long-pressing ON/OFF for under three seconds darkens the screen while keeping the Telos ready, which saves battery and hides the glow between scans; with auto shutdown on, it switches off after 30 minutes in that state.
Two troubleshooting notes from Pulsar's manual catch people out. Thermal imaging can't see through glass, so you won't see anything through a closed window. And frequent calibration just after switching on is normal while the sensor settles. For cold nights, our Telos battery guide covers runtime and charging, and our guide to Telos mounts covers tripods and vehicle use.
Telos Setup FAQ
How do I connect my Pulsar Telos to Stream Vision 2?
Open Wi-Fi Settings in the Telos main menu, switch on Wi-Fi Activation and set a password. On your phone, join the network named TELOS followed by the last four digits of the serial number, then open the Stream Vision 2 app. The Telos LRF XT50 can also pair by NFC by tapping your phone on the device.
What is the Wi-Fi password on a Pulsar Telos?
Wi-Fi is switched off by default on the Telos. You turn it on in Wi-Fi Settings in the main menu and set the password yourself under Password Setup, using the UP and DOWN buttons for each digit and a long MENU press to save. If your phone won't reconnect after a change, forget the network and join again.
How do I update the firmware on a Pulsar Telos?
Install Stream Vision 2 from Google Play or the App Store and connect the Telos to your phone. In the app, open Settings, select your device and tap Check firmware update. Wait while it downloads and installs; the Telos reboots when finished. Charge the battery before you start, and do it at home rather than in the field.
Which calibration mode should I use on my Telos?
We'd use Automatic when scanning from a rest, since the Telos calibrates itself with a 5-second countdown. Use Semi-automatic when stalking, so calibration only happens when you press ON/OFF. Manual mode needs you to close the lens cover each time, which suits careful observation when you want full control.
What does User Mode do on a Pulsar Telos?
User Mode saves your brightness and contrast settings so they carry over to your next session, instead of resetting. Set the picture the way you like it, then switch User Mode on in the main menu. It's useful if you've found a setup that works for your usual conditions and don't want to adjust it every night.
Which colour palette is best on a Telos?
The Telos offers nine palettes, with White Hot as the default. For scanning, we'd start with White Hot or Black Hot, because warm animals stand out clearly against the background. A long press of the DOWN/MODE button switches straight back to White Hot. Try others, such as Red Hot, to see which suits your eyes.
What do Normal, High and Ultra mean on a Telos?
They are amplification levels, switched with a short press of DOWN/MODE. Pulsar says the higher levels help when temperature contrast drops, for example in fog or rain. Higher amplification also adds digital noise, so Pulsar suggests turning on the smoothing filter. On a humid night, try High before Ultra.
Why is my Telos image blurry or striped?
Calibrate it. Pulsar's manual lists calibration as the fix for a blurry image, vertical stripes or an uneven background. If you see noise or ghost images after a manual calibration, the lens cover was probably open; close it and calibrate again. Frequent calibration just after switching on is normal while the sensor settles.
Why can't I see anything through a window with my Telos?
Thermal imaging can't see through glass, which reflects and blocks the heat energy the sensor reads. Pulsar's manual notes this in its troubleshooting section. Open the window, or use the Telos outside. When scanning from a vehicle, position it so the lens looks out through an open window.
Can the Pulsar Telos record sound with video?
Yes. The Telos has a built-in microphone that records sound with video, but it's switched off by default. Turn it on in the main menu. Recording starts and stops with the UP/REC button: a short press starts, pauses or resumes, and a long press stops recording or switches between video and photo modes.
Steps, button functions and settings follow Pulsar's Telos user manuals; the XT50 may differ in some details.